

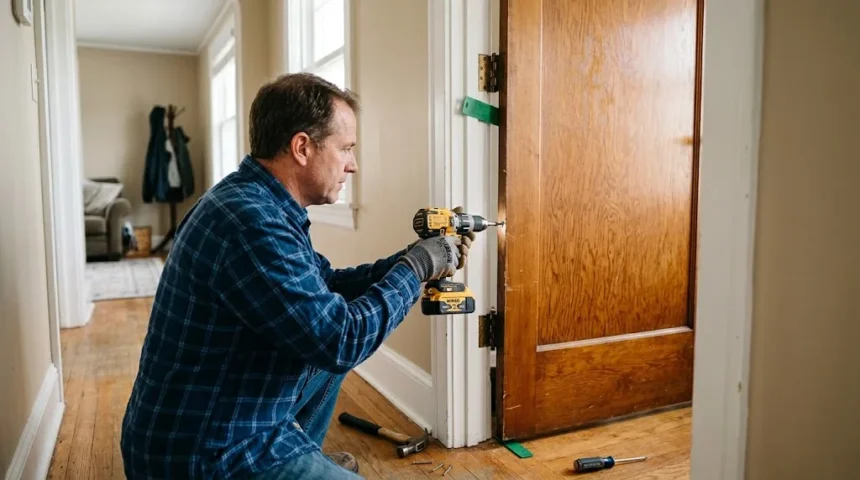
How to Fix a Sagging Door in a Few Simple Steps
A sagging door can turn a simple everyday task into an irritating struggle. The door may scrape across the floor, rub against the frame, refuse to latch, or require extra force every time you close it. Fortunately, most sagging door problems are easier to correct than they first appear. Loose hinge screws, worn hinges, minor frame movement, and the weight of the door are among the most common causes. In many cases, you can restore proper alignment using basic hand tools and a few inexpensive materials. Understanding where the problem starts helps you choose the right repair instead of unnecessarily trimming or replacing the door.
Before removing the door or reaching for a power tool, take a few minutes to inspect how it sits inside the frame. The size and shape of the gaps around the door can reveal whether the hinges, jamb, strike plate, or door itself needs attention. A door hanging lower on the latch side usually points toward a hinge-related problem, especially around the upper hinge. A rubbing door may also result from humidity, settling, damaged screws, or a slightly distorted door frame. Starting with the simplest repair reduces the risk of creating new alignment problems. This guide walks through practical sagging door repair methods from basic hinge adjustments to more involved corrections.
Fixing a sagging interior door can often be completed without professional carpentry experience, provided the door and frame remain structurally sound. The goal is not simply to stop the rubbing but to restore the door to a stable, square position inside the jamb. That means checking hinge fasteners, replacing stripped screws, adjusting hinge placement, inspecting the strike plate, and only removing wood when other solutions fail. Exterior doors require additional care because weather sealing, security, and moisture exposure can affect alignment. With a logical approach, you can identify the cause and make a durable repair rather than repeatedly tightening the same loose hardware.
Why Doors Sag and How to Identify the Real Cause
A sagging door typically develops when its weight begins pulling the latch side downward while the hinges struggle to hold the original position. This is especially common with heavy solid-wood doors, tall doors, and frequently used entryways. The upper hinge usually carries considerable leverage because it helps prevent the door from rotating away from the frame. When its screws loosen even slightly, the opposite upper corner may drop enough to create visible misalignment. You may notice the door rubbing near the top latch-side corner or dragging along the threshold. Identifying this pattern early can make the repair as simple as tightening or replacing several hinge screws.
Loose hinge screws are among the first things to inspect because repeated opening and closing can gradually work fasteners out of the wood. Screws may appear tight while actually spinning inside enlarged or stripped holes in the door jamb. If a screw turns without becoming firmly seated, the surrounding wood is no longer providing adequate grip. This allows the hinge leaf to move slightly each time the door operates, causing the alignment to worsen. Paint buildup around the hinge may also hide small amounts of movement that are difficult to see initially. Testing every hinge screw individually can reveal problems that are easy to overlook during a quick visual inspection.
The hinges themselves can also wear, bend, or develop excessive play after years of use. A worn hinge pin allows the two hinge leaves to move farther apart than intended, which may cause the door to droop. You can sometimes detect this problem by opening the door slightly and gently lifting its outer edge. Noticeable vertical movement around the hinge barrels suggests that the hinge hardware may be worn or loose. Rust, bent hinge knuckles, missing screws, or damaged hinge leaves are additional warning signs. Replacing a worn hinge with one that matches the original size and screw pattern can restore alignment without modifying the door.
Not every door that rubs is actually sagging, so examining the gap around the entire perimeter is important. A genuinely sagging door often shows a wider gap near the upper hinge-side area and a tighter gap near the upper latch-side corner. Seasonal swelling, by comparison, may produce a relatively even tight spot along one edge of a wooden door. A shifting frame can create inconsistent gaps on both sides, while a badly positioned strike plate may cause latching trouble even when the door hangs correctly. Use the gap pattern as a diagnostic clue rather than assuming the door needs trimming. Correct diagnosis keeps a minor adjustment from becoming an unnecessary woodworking project.
Structural movement should also be considered when repeated hinge repairs fail to keep the door aligned. Homes naturally settle, and framing can shift slightly over time as materials expand, contract, or respond to moisture. More significant movement may cause the door jamb to twist or move out of square. Place a carpenter’s level against the vertical jamb and inspect whether the frame remains reasonably plumb. Cracks developing around the doorway, rapidly changing gaps, or several nearby doors suddenly sticking may indicate a broader framing issue. In those situations, correcting the door hardware alone may provide only temporary improvement, so investigating the surrounding structure becomes more important.
Tools and Preparation for Sagging Door Repair
Most sagging door repairs require only a small collection of common household tools, which makes this a practical DIY project for many homeowners. A Phillips screwdriver or compatible driver bit is essential because hinge screws are usually the first components requiring attention. A drill or impact driver can be useful for installing replacement screws, although excessive torque can strip wood or damage screw heads. Keep several longer wood screws available in case the existing jamb screws no longer grip securely. A tape measure, pencil, and carpenter’s level can help you evaluate gaps and alignment. Having everything nearby prevents repeated interruptions once you begin adjusting the door.
A wooden shim, thin cardboard, or commercially available hinge shim can be helpful when a hinge requires a minor position adjustment. You may also need wood glue, toothpicks, wooden dowels, or small wood splinters for repairing stripped screw holes. A hammer and hinge-pin punch are useful if the door must be removed or a hinge pin requires adjustment. For more advanced corrections, keep a sharp chisel, utility knife, sanding block, or hand plane available. These tools should only be used after simpler hinge repairs have been attempted. Removing wood too early can create an oversized gap once the actual sagging problem is corrected.
Begin the repair by opening and closing the door slowly while watching each edge instead of immediately loosening hardware. Look for shiny areas, scraped paint, compressed weatherstripping, or marks where the door contacts the jamb. Check whether the latch lines up with the center of the strike plate and whether lifting the handle slightly allows the door to close more easily. That particular symptom often indicates that the latch side has dropped. Examine the reveal, which is the visible gap between the door and frame, from top to bottom. Uneven reveals provide valuable clues about which hinge or corner needs correction.
Support the door whenever you plan to loosen hinges or remove multiple screws at the same time. A door can be surprisingly heavy, and allowing its weight to hang from one partially attached hinge may damage both the hardware and the jamb. Slide a wedge, stack of thin boards, or purpose-made door lifter under the outer edge to hold the door near its proper height. Adjust the support gradually until the gaps appear more even rather than forcing the door upward. Keeping the weight supported also makes screws easier to remove and reinstall accurately. This simple precaution can prevent additional stripping and reduce stress on the remaining hinges.
Before making permanent changes, inspect the hinge mortises where the metal hinge leaves sit recessed into the door and jamb. Each leaf should sit reasonably flush rather than protruding noticeably above the surrounding wood. Paint, debris, damaged wood, or poorly cut mortises can prevent the hinge from seating correctly and alter the door position. Confirm that hinge screws are the correct size and are not pulling through enlarged holes in the metal leaf. Also inspect the door edge for cracks near the screw locations. If the wood itself is badly split or deteriorated, reinforcement may be necessary before ordinary hinge adjustments can hold securely.
How to Fix a Sagging Door Step by Step
Start with the simplest repair by tightening every hinge screw on both the door and jamb sides. Use a hand screwdriver first whenever possible because it gives you better control and helps prevent overtightening. Begin with the upper hinge, since movement there commonly allows the latch side of the door to drop. Tighten each screw until the hinge leaf sits firmly against the wood, but stop if the screw begins spinning without resistance. Repeat the process on the middle and lower hinges while watching whether the door position changes. Close the door afterward and compare the gaps to see whether this basic adjustment solved the sagging problem.
If the door still hangs low, replace one of the upper hinge screws on the jamb side with a longer wood screw. A screw approximately 2½ to 3 inches long can often reach beyond the thin jamb material and bite into the structural framing behind it. Position the longer screw in a hole that provides a direct path toward solid framing, commonly near the center of the hinge leaf. Drive it gradually while observing the door gap rather than tightening it aggressively all at once. The screw can pull the upper jamb and hinge slightly toward the framing, raising the opposite corner of the door. Stop tightening once alignment improves to avoid distorting the jamb.
After installing the longer screw, close the door several times and check the reveal around the top and sides. You are looking for a reasonably consistent gap rather than absolute mathematical perfection. Pay particular attention to the upper latch-side corner, which is often where a sagging door first contacts the frame. If the gap is still too narrow there, another small adjustment may be needed at the upper hinge. However, do not continue tightening a structural screw indefinitely in an attempt to force a badly warped frame into position. Excessive force can bow the door jamb and create new rubbing points elsewhere.
Next, check whether the hinge leaves are sitting flat and fully seated inside their mortises. A loose hinge may pull away from the wood, while paint or damaged fibers underneath it can hold the metal slightly proud of the surface. Remove one hinge leaf at a time while keeping the door supported, then clean away loose paint, debris, or crushed wood. Reinstall the hinge and tighten the screws evenly so the leaf remains flat. If the mortise is excessively deep, a thin hinge shim can restore the leaf to the proper level. Very small changes in hinge position can create noticeable changes at the far edge of the door.
Once the hinges are secure, test the door throughout its entire swing instead of checking only whether it closes. It should move freely without lifting, dropping, binding, or suddenly shifting near the frame. Listen for scraping sounds and inspect areas where fresh marks appear after several opening cycles. Confirm that the latch enters the strike plate without needing to lift or push the handle sideways. If the door now hangs evenly but the latch remains slightly misaligned, the strike plate may simply need adjustment. Completing these checks prevents you from continuing to alter hinges after the main sagging problem has already been corrected.
Repairing Stripped Screw Holes and Worn Hinges
A stripped screw hole is a common reason sagging doors return shortly after someone tightens the hinges. When the wood fibers inside the hole become damaged, the screw threads have nothing solid to grip. The screw may appear seated but loosen again as soon as the door places weight on the hinge. One simple repair involves filling the hole with small wooden pieces coated lightly with wood glue. Wooden toothpicks, matchstick-sized splinters, or a properly sized dowel can provide fresh material for the screw. Allow glue to set when necessary, trim the repair flush, and then reinstall the screw into solid wood.
For a stronger repair in badly damaged holes, drill the opening cleanly and insert a hardwood dowel that closely matches the hole diameter. Apply wood glue to the dowel before tapping it into place, then allow the adhesive to cure completely. Cut the dowel flush with the jamb or door edge and create a small pilot hole for the replacement screw. This method provides a substantial amount of fresh wood and can work well on heavier doors. Keep the pilot hole slightly smaller than the screw’s core diameter so the threads can bite securely. Accurate drilling also reduces the risk of splitting the repaired area when the screw is driven.
Replacing worn hinges may be necessary when tightening and screw-hole repair do not eliminate movement. Purchase hinges that match the existing height, width, corner style, and general screw-hole arrangement whenever possible. Matching dimensions reduces the amount of chiseling or mortise modification required during installation. Remove and replace one hinge at a time while supporting the door, which helps preserve the existing alignment. Confirm that each new hinge leaf sits flush inside its recess before fully tightening the screws. High-quality hinges are particularly worthwhile for heavy solid-core or frequently used exterior doors because they resist wear more effectively over time.
Sometimes a hinge is not worn but slightly bent, causing the door to sit farther from or closer to the jamb than intended. Minor hinge adjustment is sometimes called hinge tweaking or hinge bending, but it should be approached carefully. Aggressive bending can damage hinge knuckles, loosen screws, or cause the leaves to bind during operation. A safer DIY approach is often to correct screw tension or use thin hinge shims before physically bending hardware. If professional hinge-adjusting tools and experience are available, very small controlled changes can alter the door position. Otherwise, replacing a visibly distorted hinge is usually more predictable than repeatedly bending it.
Lubricating hinges will not correct structural sagging, but it can improve movement after alignment has been restored. Dirt, corrosion, or dried lubricant around the hinge pin can create stiffness that makes the door feel heavier or rougher than it actually is. Clean accessible hinge components and apply a small amount of appropriate hinge lubricant rather than soaking the surrounding wood. Move the door several times to distribute the lubricant and wipe away excess material. If squeaking quickly returns or the hinge shows obvious side-to-side play, lubrication may only be masking significant wear. Replacing damaged hardware is more effective when the hinge itself can no longer maintain stable alignment.
Fixing Rubbing, Latch, Frame, and Strike Plate Problems
If the door hangs evenly after the hinge repair but still refuses to latch, inspect the strike plate before changing anything else. Close the door slowly and observe where the latch meets the plate opening. Marks above or below the opening can reveal whether the latch is only a few millimeters out of alignment. Loosen the strike plate screws slightly and reposition the plate when the existing screw holes allow enough movement. For larger adjustments, the mortise around the plate may need careful modification with a sharp chisel. Make only the minimum change necessary because oversized strike plate recesses can look untidy and weaken screw placement.
A door that rubs along one section of the frame may need a minor hinge adjustment rather than sanding. For example, rubbing near the upper latch-side corner often indicates that the door is still dropping from the top hinge area. Rubbing along the lower hinge-side edge may point toward a different alignment issue or an improperly positioned hinge leaf. Compare the gaps on the opposite edge before removing any material from the door. If adjusting hinge screws or shims can move the entire door into a better position, that solution preserves the original door dimensions. Sanding should generally be reserved for genuine swelling, slight warping, or situations where hardware alignment is already correct.
Wooden doors commonly expand when indoor humidity rises, particularly if edges were never properly sealed. A door that works perfectly during dry months but begins sticking during humid weather may be swelling rather than sagging. Inspect whether the gap is consistently tight along a larger portion of the edge instead of concentrated near one corner. Improving ventilation and controlling indoor humidity may reduce minor seasonal movement without permanently altering the door. If the swelling is persistent, carefully sanding the affected area can provide additional clearance. Remember to seal exposed wood afterward so the freshly sanded surface does not absorb moisture more readily.
A hand plane may be appropriate when a door remains too large for its opening after hinge, frame, and moisture issues have been ruled out. Mark the rubbing area clearly with a pencil and remove the door if necessary for safe, controlled planing. Take extremely thin passes and test the fit frequently because removing too much wood cannot be easily reversed. Maintain the original edge angle and avoid cutting into hinge or latch hardware. For very small corrections, sanding may offer greater control than a plane. After achieving the proper clearance, smooth the surface and restore paint, primer, stain, or sealer to protect exposed material.
Problems originating in the door frame require a different approach because constantly modifying the door may never create lasting alignment. Check whether the jamb remains securely fastened to the framing and whether visible sections appear bowed or twisted. Loose casing, large wall cracks, water damage, or significant movement around the opening deserves closer investigation. Minor jamb movement can sometimes be corrected with strategic fastening and shimming, but larger structural changes may require an experienced carpenter. Exterior openings are especially important because poor alignment can affect locking, weather sealing, and security. When several repairs fail repeatedly, treating the frame as the possible source is more effective than continuing to remove material from the door.
How to Prevent a Door From Sagging Again
Preventing future sagging begins with making sure the hinges remain firmly anchored in solid wood. Periodically check frequently used doors for screws that have started backing out, particularly around the upper hinge. Correcting a loose screw early prevents repeated movement from enlarging the hole and weakening the surrounding fibers. Avoid simply driving loose screws harder each time because overtightening can strip the wood and make the problem worse. If a screw repeatedly loses grip, repair the hole or install a suitable longer fastener. Stable hinge attachment is one of the most effective ways to maintain consistent door alignment over time.
Heavy doors benefit from properly sized hinges that can support their weight without excessive wear. A tall or solid-core door may require more hinge support than a lightweight hollow-core interior door. If hinges repeatedly loosen or deform, confirm that the existing hardware is appropriate for the door rather than repeatedly repairing undersized components. Adding an additional hinge can sometimes distribute the load more effectively, although installation must be precise. New hinge mortises should align correctly so the added hardware does not force the door into a twisted position. When upgrading hardware, choose durable hinges with compatible dimensions and suitable fasteners for the door and frame.
Moisture control is also important for wooden doors because repeated swelling and shrinking can place additional stress on hinges and frames. Bathrooms, laundry areas, basements, and exterior entryways may experience greater humidity changes than other parts of the home. Use ventilation where appropriate and repair leaks that allow door edges or jambs to absorb moisture. When painting or refinishing a wooden door, sealing all exposed edges helps limit uneven moisture absorption. The top and bottom edges are often forgotten because they are less visible after installation. Protecting the entire door surface can reduce seasonal sticking and help the door maintain a more consistent shape.
Avoid putting unnecessary downward pressure on door handles, knobs, or the outer edge of an open door. Children hanging on handles, heavy organizers attached to doors, and repeated impacts can increase leverage on hinge screws. Over-the-door storage systems should be used carefully on doors that already show signs of alignment problems. Likewise, forcing a sticking door closed can worsen hinge movement, damage the latch, or compress the frame. Investigate the source of resistance rather than applying additional force each day. Small changes in how a heavily used door is treated can significantly reduce stress on its hinges and extend the life of the hardware.
Regular inspection is especially valuable after installing a new door because small alignment changes may occur as hardware settles into place. Check the perimeter gap, latch operation, hinge screws, and contact points occasionally during the first months of use. A tiny adjustment made early is usually easier than repairing several stripped hinge holes later. Pay attention when a previously quiet door begins squeaking, scraping, or requiring extra pressure to latch. These symptoms often appear before the sag becomes visually obvious. Maintaining the hardware as part of ordinary home care can keep an interior or exterior door operating smoothly for years.
Common Mistakes to Avoid When Fixing a Sagging Door
One of the most common mistakes is trimming the door before checking the hinges. Sanding or planing may appear to solve a rubbing problem immediately, but it does nothing to correct loose hardware that caused the door to drop. Once the hinges are eventually repaired, the trimmed door may have an unnecessarily large or uneven gap around the frame. This can look unattractive and may reduce weather sealing on an exterior door. Always inspect and secure the hinges before removing permanent material from the door. Treat trimming as a finishing correction rather than the first response to a door that suddenly starts rubbing.
Another mistake is overtightening long hinge screws in an attempt to pull the door aggressively into position. Structural screws can be extremely effective because they reach solid framing behind the jamb, but too much tension can distort the frame. A bowed jamb may cause the door to bind at another location or create an uneven reveal. Drive the screw gradually and stop periodically to close the door and inspect the result. Small adjustments often produce surprisingly large changes at the opposite edge of the door. If significant force is required, investigate whether the frame or hinge mortise is creating resistance instead of continuing to tighten.
Using screws that are too large for the hinge holes can also cause unnecessary problems. Oversized screw heads may sit above the hinge leaf and contact the opposite hinge when the door closes. Screws that are excessively thick can split a narrow section of the jamb or door edge, especially without a pilot hole. Choose fasteners that fit the countersunk hinge openings while providing adequate length and thread engagement. When installing a longer jamb screw, match the head shape to the hinge as closely as possible. A properly seated screw should finish flush with the hinge surface rather than creating a new obstruction.
Ignoring the gap pattern around the door is another frequent source of ineffective repairs. Some people repeatedly adjust whichever hinge seems easiest to reach without considering how that movement affects the opposite corners. Door alignment is interconnected, so changing one hinge can alter gaps at several points simultaneously. Before each adjustment, observe where the door is tight and where the reveal is unusually wide. Make one controlled change, test the door, and then decide whether another correction is necessary. This methodical process may feel slower initially, but it reduces unnecessary modifications and makes it easier to identify which adjustment actually improved the fit.
Finally, avoid treating recurring door sag as purely cosmetic when other signs suggest structural or moisture problems. A door that repeatedly moves out of alignment despite secure new hinges may be responding to a shifting jamb or surrounding framing. Soft wood, staining, swelling, or peeling paint can indicate moisture damage that should be addressed before additional hardware is installed. Multiple doors suddenly sticking in the same area of a home may also deserve closer inspection. Most minor sagging doors are straightforward DIY repairs, but persistent movement can point toward a larger issue. Recognizing that distinction prevents repeated temporary fixes and protects the doorway from additional damage.
Conclusion: Restore a Sagging Door Without Making the Problem Worse
Learning how to fix a sagging door is largely about diagnosing the problem before making permanent changes. Loose upper hinge screws cause many alignment issues, which means the easiest solution should always be tested first. Tightening the hinges, replacing weak screws, and securing the jamb to solid framing can often lift the latch side back into position. These repairs require little more than a screwdriver, suitable screws, and careful observation. Checking the gaps after each adjustment helps prevent overcorrection. A patient approach usually produces a cleaner and more durable result than immediately sanding or planing the door.
When ordinary tightening does not work, inspect the screw holes and hinges themselves. Stripped wood cannot hold hardware securely, so damaged holes may need toothpicks, dowels, wood glue, or another appropriate repair. Worn or bent hinges should be replaced when they can no longer support the door consistently. Thin hinge shims can also correct small alignment differences without altering the door permanently. These techniques address the mechanical source of sagging instead of merely creating clearance around the symptoms. Once the hinges are stable, the door should retain its alignment much more reliably through regular use.
If the door becomes properly aligned but continues rubbing or refusing to latch, move your attention to the strike plate, frame, and door dimensions. Minor strike plate adjustments can solve latching problems that remain after the sag has been corrected. Seasonal wood expansion may require humidity control or a small amount of sanding, while genuine sizing problems may justify careful planing. The important point is to remove wood only after hardware and alignment issues have been ruled out. Because trimming is permanent, gradual removal and frequent testing are essential. Refinish any exposed wood afterward to reduce future moisture absorption.
Homeowners should also watch for symptoms that extend beyond an individual door. Significant jamb movement, spreading wall cracks, moisture damage, or several doors suddenly sticking can indicate problems that hinge adjustments alone cannot solve. A carpenter can evaluate complicated frame issues, while more substantial structural concerns may require additional professional assessment. Exterior doors deserve particular attention because alignment affects security, weather resistance, and energy efficiency as well as appearance. Seeking help when the underlying cause is unclear can prevent unnecessary alterations. DIY repairs work best when the door, jamb, and surrounding framing are fundamentally sound.
For most household doors, however, sagging is a manageable maintenance issue rather than a reason for immediate replacement. Start by inspecting the door, tighten the hinges, reinforce weak screw connections, and evaluate the results after every adjustment. Work from reversible repairs toward permanent ones, leaving sanding and planing until simpler solutions have been exhausted. Maintain secure hinges and control excess moisture to reduce the chances of the problem returning. These habits help doors close quietly, latch correctly, and maintain even gaps throughout their service life. With a few careful steps, an annoying sagging door can often be restored to smooth operation without an expensive repair.
Frequently Asked Questions
Why does my door suddenly sag?
A door can begin sagging when upper hinge screws loosen, screw holes become stripped, hinges wear, or the surrounding frame moves slightly. Heavy doors and frequently used doors are especially likely to develop these problems over time.
Can I fix a sagging door without removing it?
Yes, many sagging doors can be repaired while they remain installed. Tightening hinge screws, installing a longer upper hinge screw, repairing stripped holes, or adjusting the strike plate usually does not require complete door removal.
What size screws should I use for a sagging door hinge?
Existing hinge screws should match the hinge holes, while a longer jamb-side screw of roughly 2½ to 3 inches is commonly used when additional grip in the framing is needed. The exact screw should suit the hinge, jamb, framing, and door weight.
Should I sand a door that rubs against the frame?
Sanding should usually come after checking the hinges, screw holes, jamb alignment, and seasonal swelling. If the hardware is secure and the door still has a genuine tight area, careful sanding can provide the small amount of clearance required.
When should I call a professional for a sagging door?
Professional help is worth considering when the frame is badly twisted, wood is damaged by moisture, the door repeatedly becomes misaligned, or several nearby doors develop problems at the same time. These symptoms can indicate a larger framing or structural issue rather than ordinary hinge wear.